How to Dial in a Riflescope for Long-Range Shooting
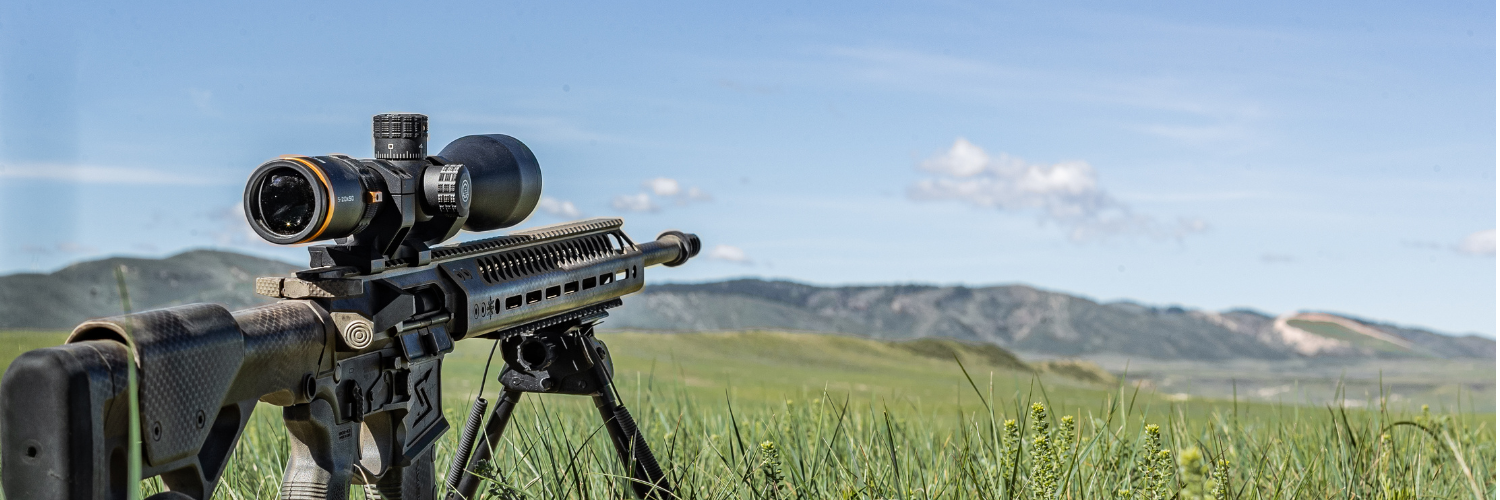
Knowing how to set up your riflescopes properly gives you the foundation you need for consistent, accurate shooting. Before you ever dial for distance or hold for wind, your optic should be correctly focused, adjusted for parallax, and precisely zeroed.
This quick guide walks you through each step. You’ll learn how to understand your reticle, confirm your zero, and build confidence behind the rifle.
Whether you are a needing riflescope for long range competition shooting, hunting, or anything in-between, these fundamentals matter and will help you become a better long range shooter.
Focusing the Reticle
First, start by turning the ring closest to your eye. This is called the ocular ring, or ocular diopter adjustment and is used for changing the focus of your riflescope.
Step-by-Step Instructions
1. Set scope magnification to a high level.
2. Rotate the ocular ring in either direction as far as it will go.
3. Point the scope toward a distant cloud or the sky itself. Look into the scope at the reticle, preferably with both eyes open, or however you normally look through a scope.
4. Rotate the eyepiece ring until the reticle comes into sharp, clear focus.
5. Once the image is in focus, close your eyes for three or four seconds. Then open them again. The reticle should still be clear. If it isn’t, repeat the process until it is.
6. Drop the magnification to lowest setting, then look through the scope to confirm that the reticle is still in focus. If not, repeat steps 1 through 6.
This step is important when learning how to use a grid style reticle for long range shooting.
Adjusting for Parallax
Now that your reticle is focused, let’s adjust for parallax.
The word “parallax” is used to describe the difference in how an object appears when viewed from different angles. Think of a car’s speedometer. From the driver’s seat, the needle looks correct. From the passenger seat, it can look slightly off.
At shorter distances, parallax doesn’t matter as much. This is why it’s often ignored on lower magnification optics. But it matters a lot more on higher magnification setups used for long range shooting.
Next, turn the parallax adjustment knob, usually on the left side of the scope. This moves the target into the same focal plane as the reticle, which eliminates the parallax effect in your riflescope.
How to Check for Parallax
1. Looking through the scope at a distant object.
2. Move your head slightly up, down, left, and right.
3. If the target seems to move against the reticle, you have parallax error.
4. Turn the parallax knob until the target stays fixed, even when you move your head.
Repeat this whenever you change distance or shooting conditions.
Check out this short video for more information on removing parallax. Watch Video
Zeroing Your Rifle
First, you’ll need to set up a target. It can be as simple as a big sheet of paper with a dot or square in the middle. Pick the distance you want to zero your rifle at. Many shooters use 100 yards or 100 meters.
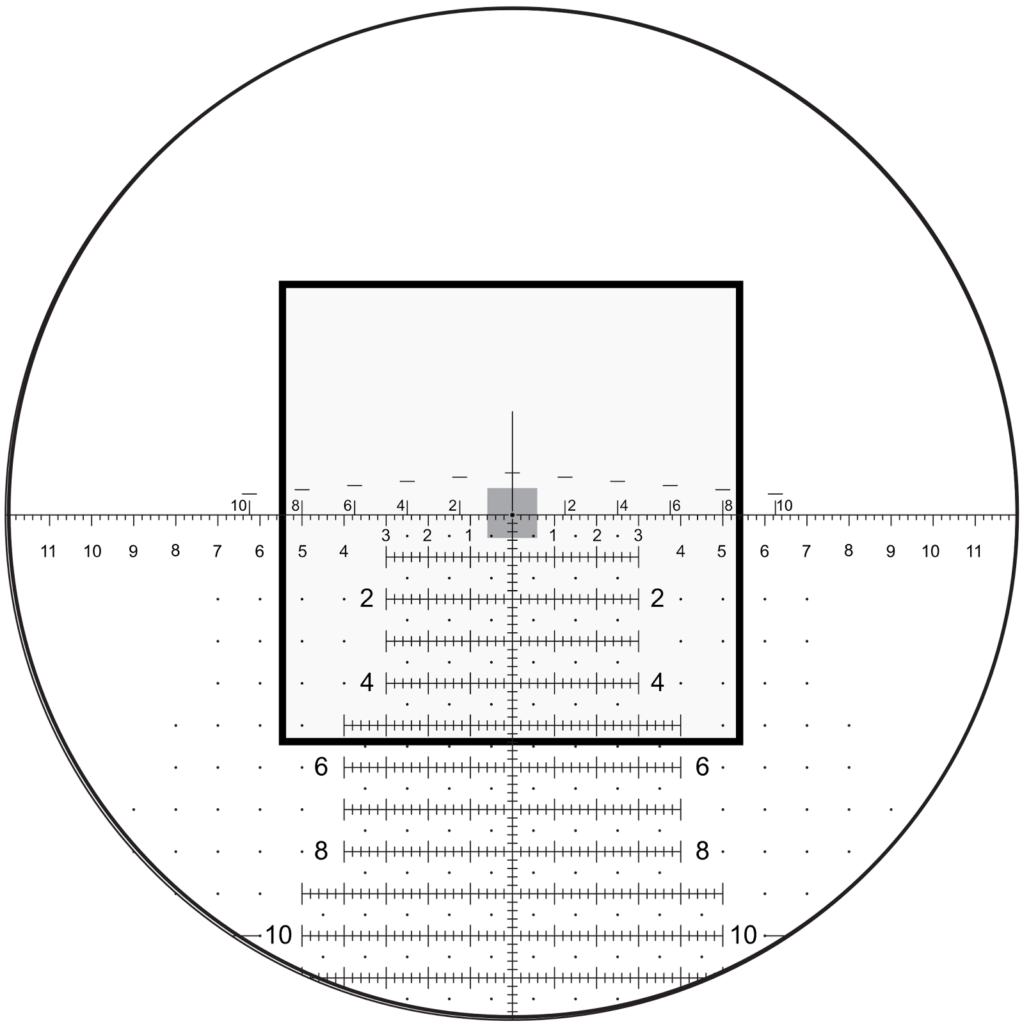
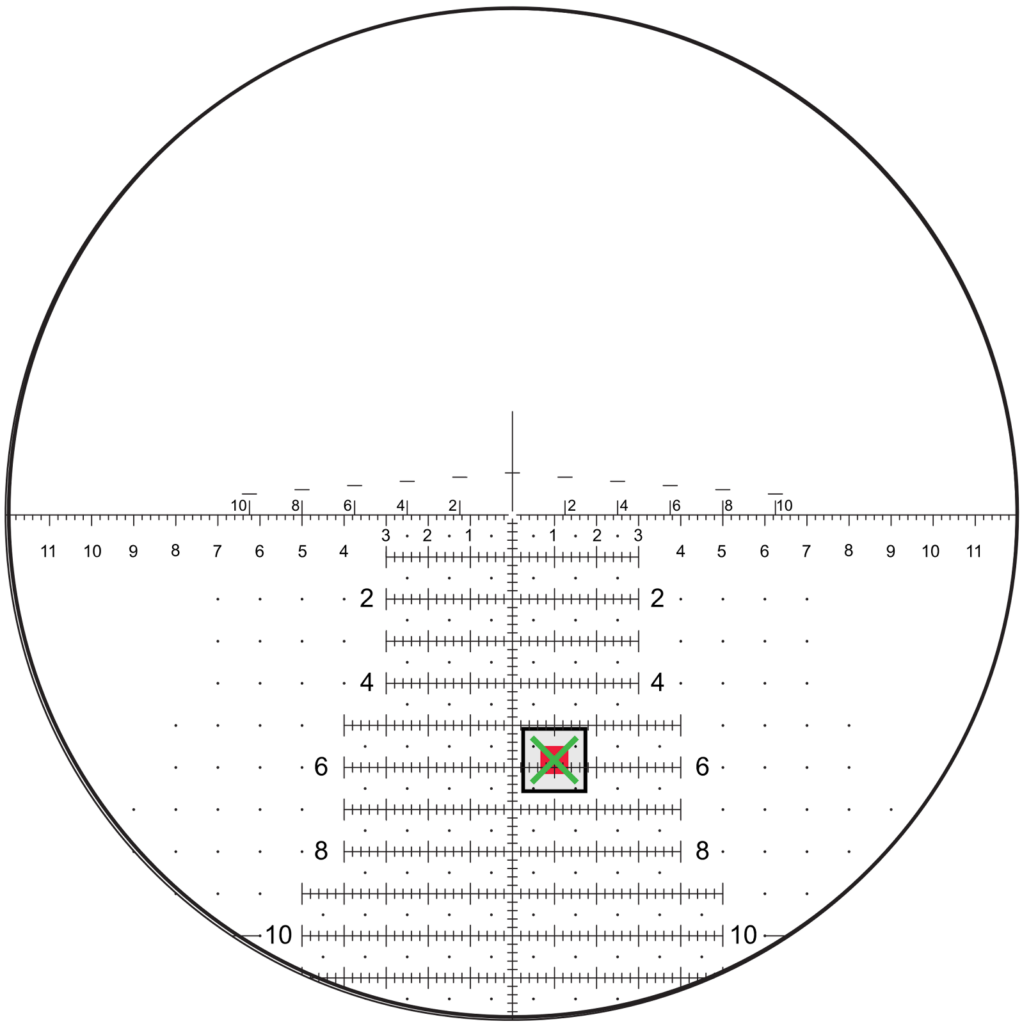
Let’s take a look at this quick example. Here, we are using a Horus H59™ reticle.
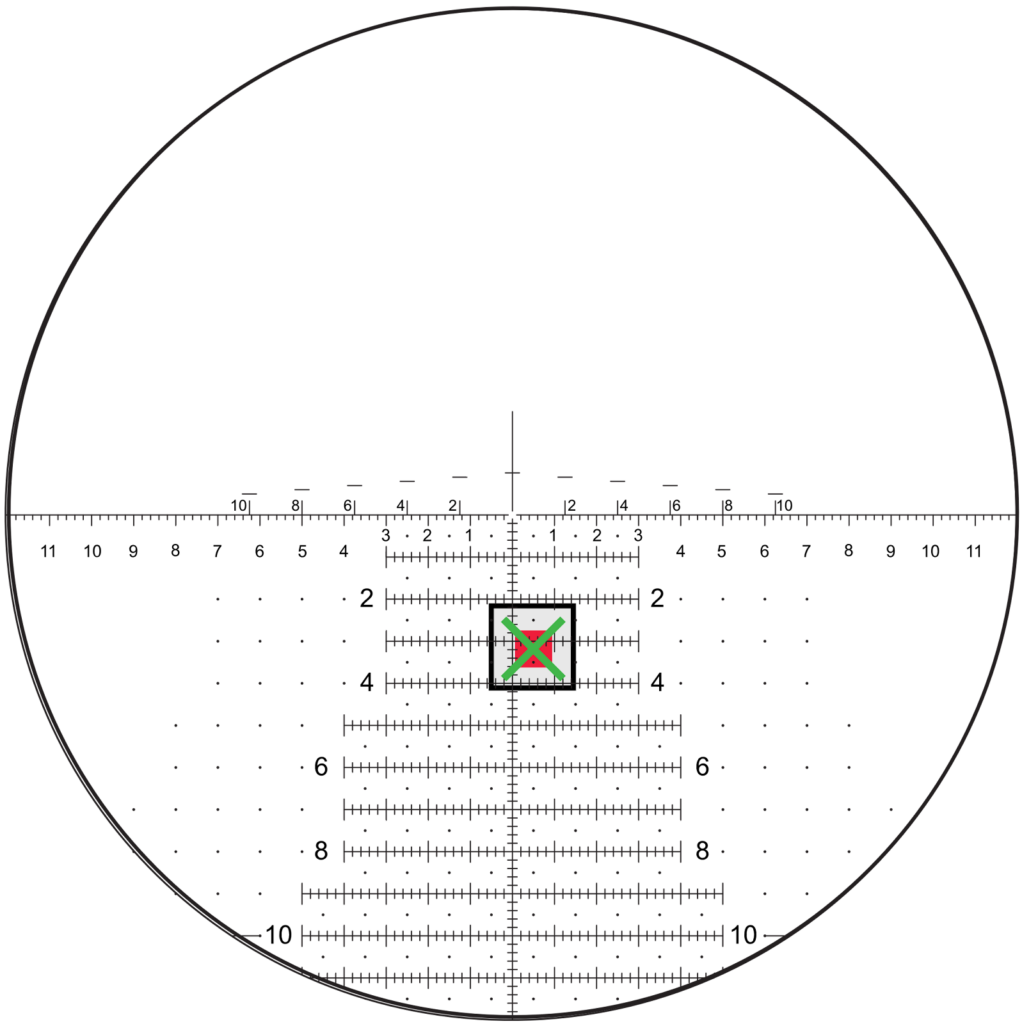
Look through the scope and put the crosshairs on the target. Take your shot.
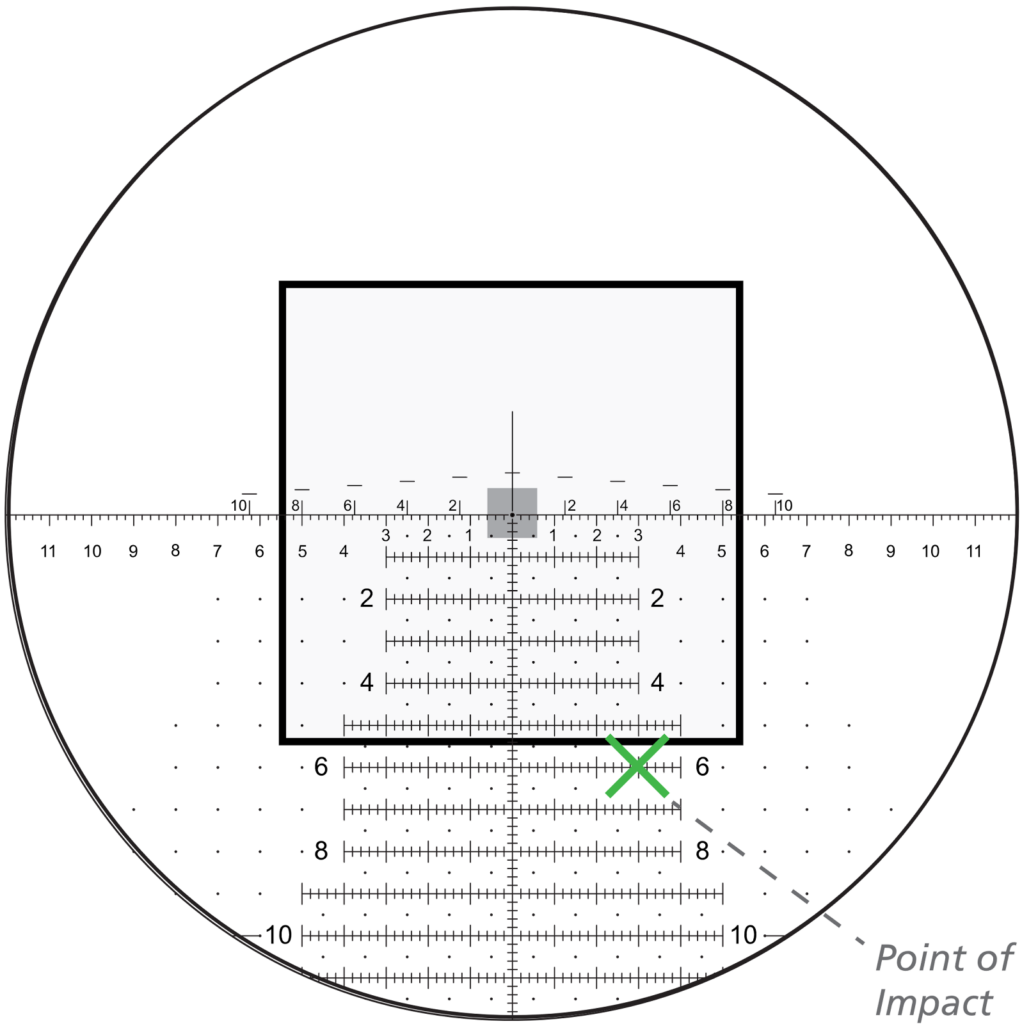
Your first shot missed, low and to the right.
With eye to scope, note the point on the grid where the bullet struck. Use the grid to measure the vertical and horizontal adjustments you need to make with the turret knobs of your scope. (It can be as shown here, 6 mils up and 3 mils to the right.)
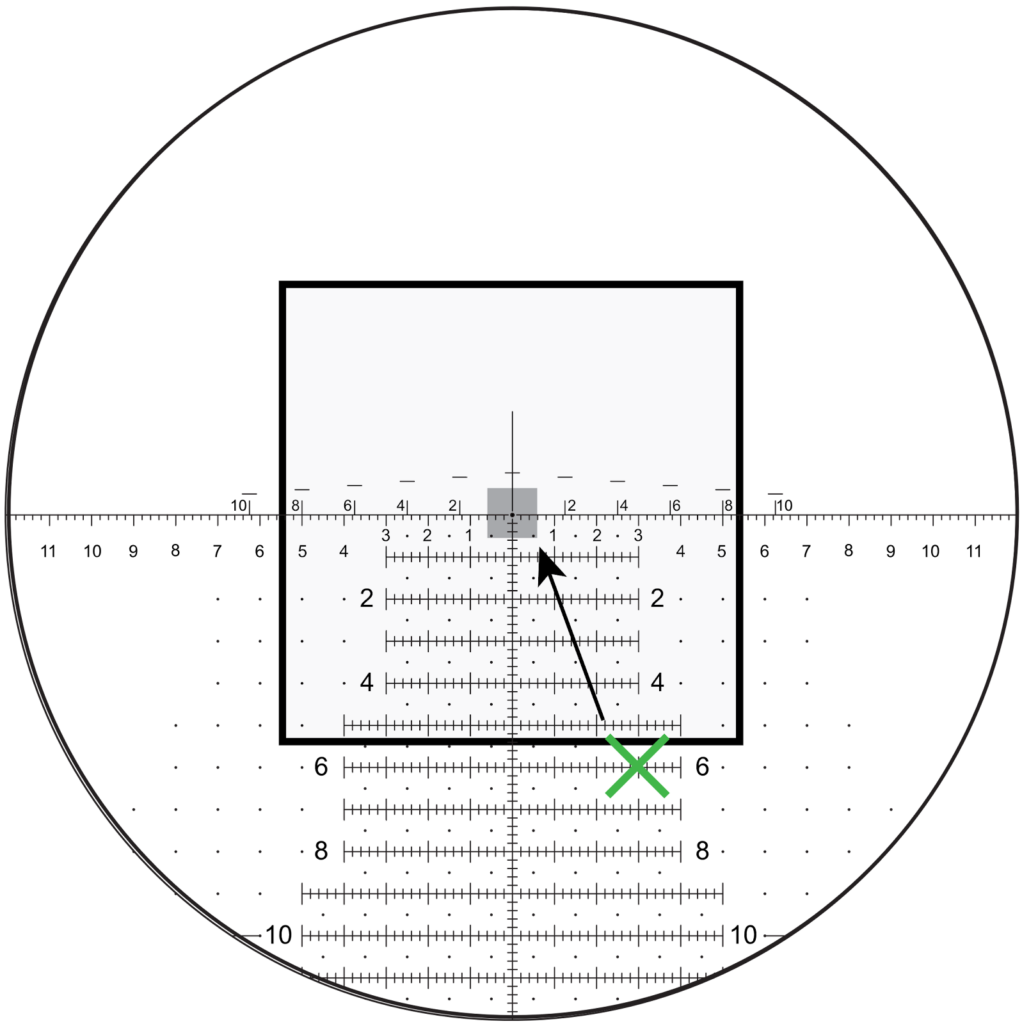
Once you’ve adjusted the turret knobs on your scope, put the crosshairs on the target and fire another shot. Your rifle should now be zeroed. If not, correct again by using the same process until your rifle is zeroed.
Click here for more information on zeroing your rifle.
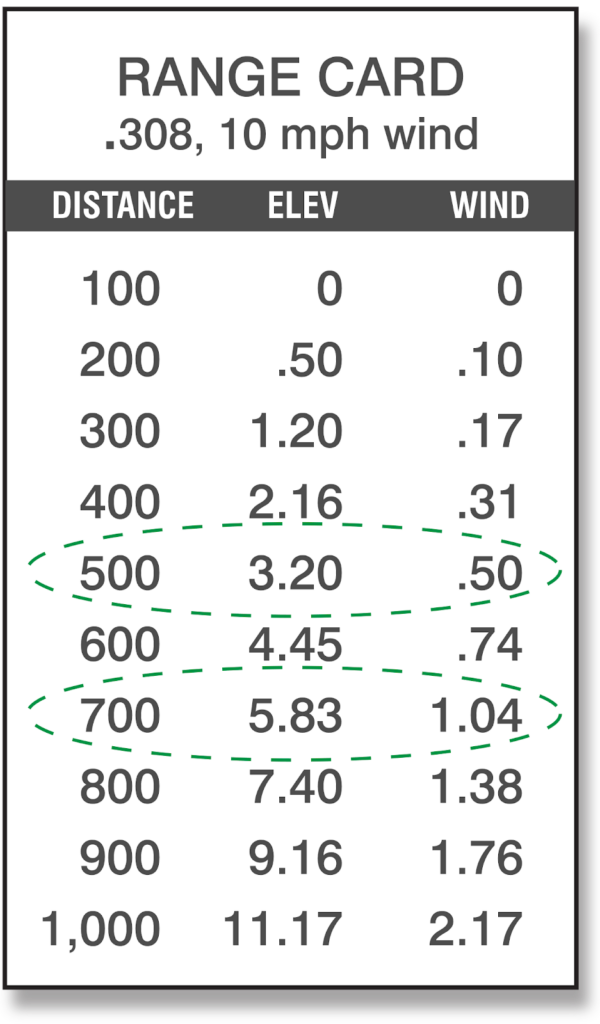
Adjusting for Elevation and Wind
For this example, we will use a .308 rifle firing 175-grain bullets with a 10-mph wind from left to right. This is a full-value wind, which is common in long range shooting.
Let’s say you’ve zeroed your rifle at 100 yards and want to take a shot at 500 yards. Referring to the example range card shown below, hold for elevation at 3.2 mils* down from the main horizontal crosshair, and hold for windage at 0.5 mils into the wind.
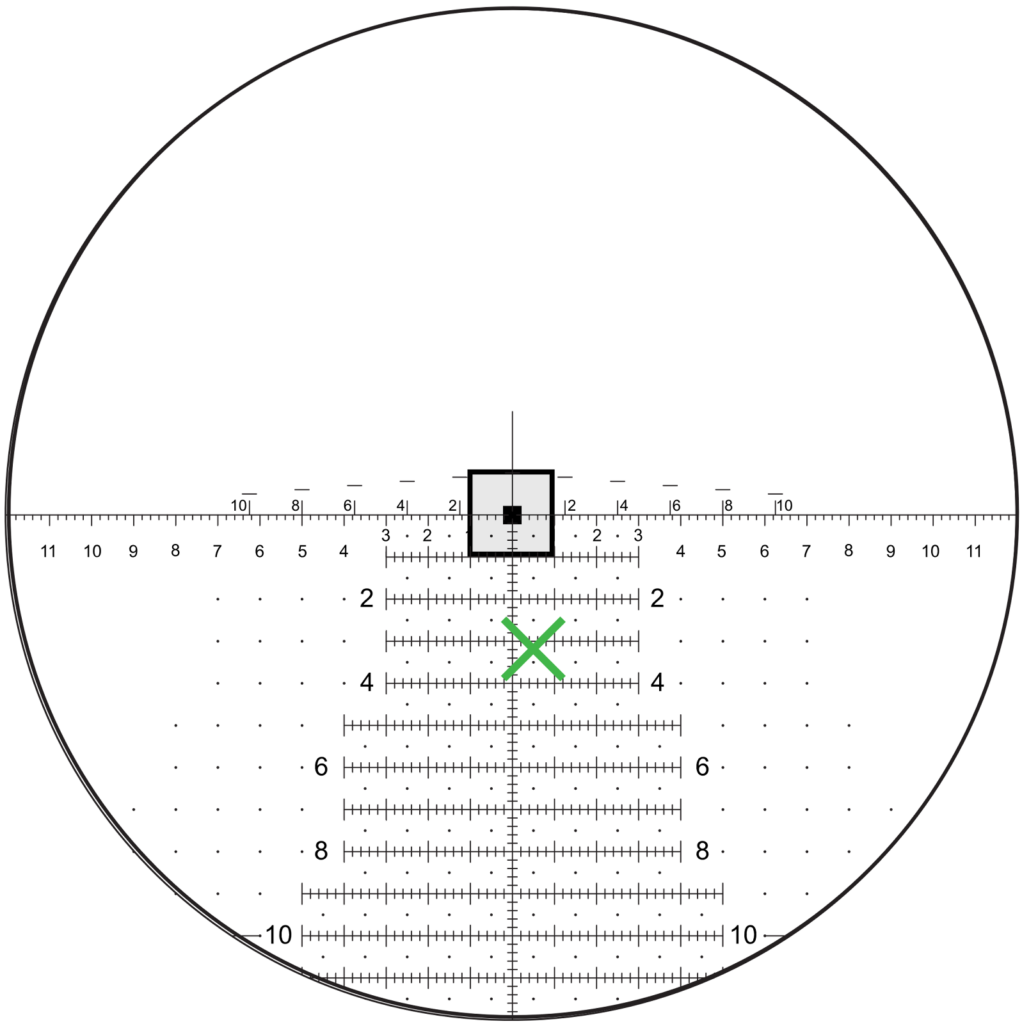
With eye to scope, find the hold point on the reticle and move rifle up and to the left, “dragging” the hold point until it is on the target. Take your shot.
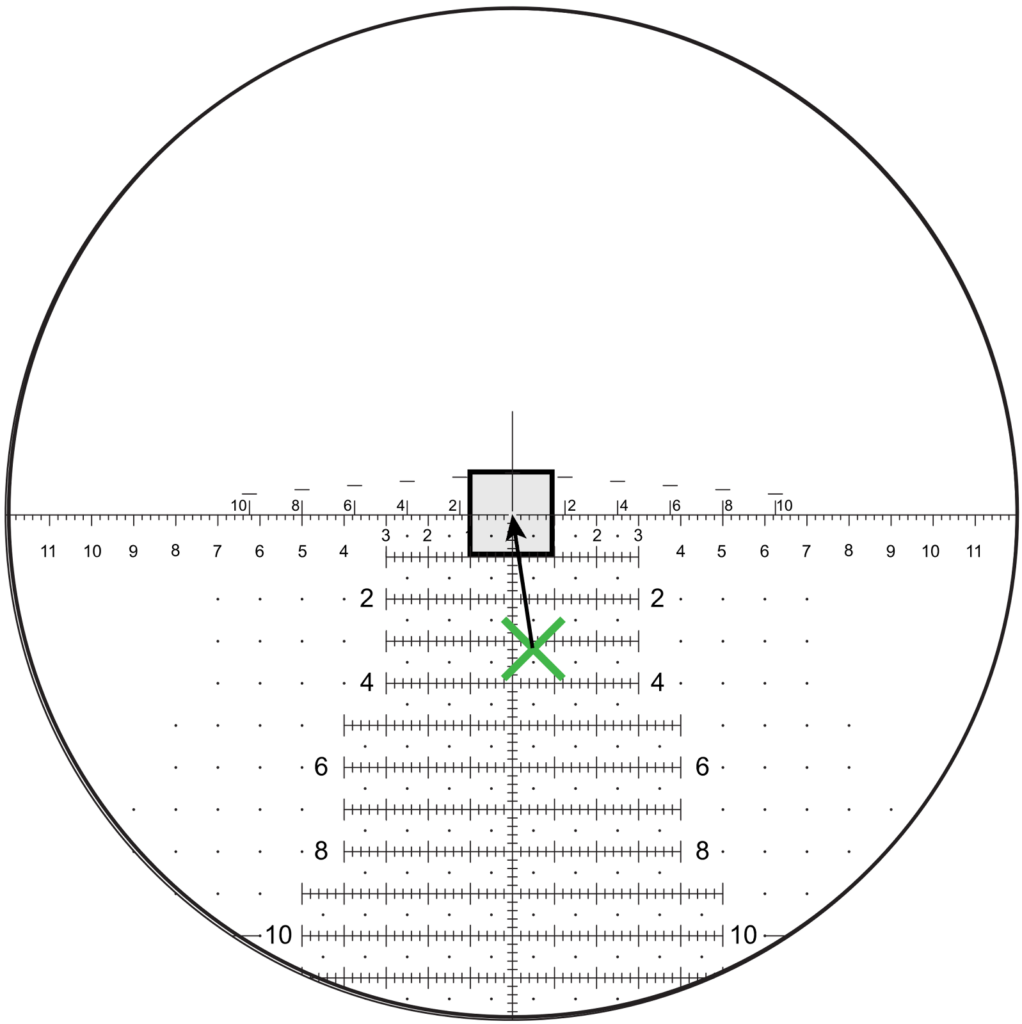
Say you now want to try a 700-yard shot with the same 10-mph right-to left crosswind. The example range card shows the elevation hold at 5.8 down and the windage hold at 1.0 mil into the wind.
Find that hold point and drag it up and to the left until it is on the target. Take your shot. It should be a bullseye.
Want to better understand how to use the Time-of-Flight Wind Dots? Watch Video
Conclusion
Taking time to properly set up your rifle will pay off. When you correctly zero your rifle, remove parallax error, and learn how to use a reticle with wind and elevation holds, shooting becomes more predictable.
Remember that environmental conditions, distance changes, and shooting positions can all impact your accuracy, so be sure to periodically verify your settings.
With practice and attention to detail, these basic fundamentals will help you make the most of your equipment and improve your overall shooting skills.
Keep an eye out for more tips and tutorials coming soon.